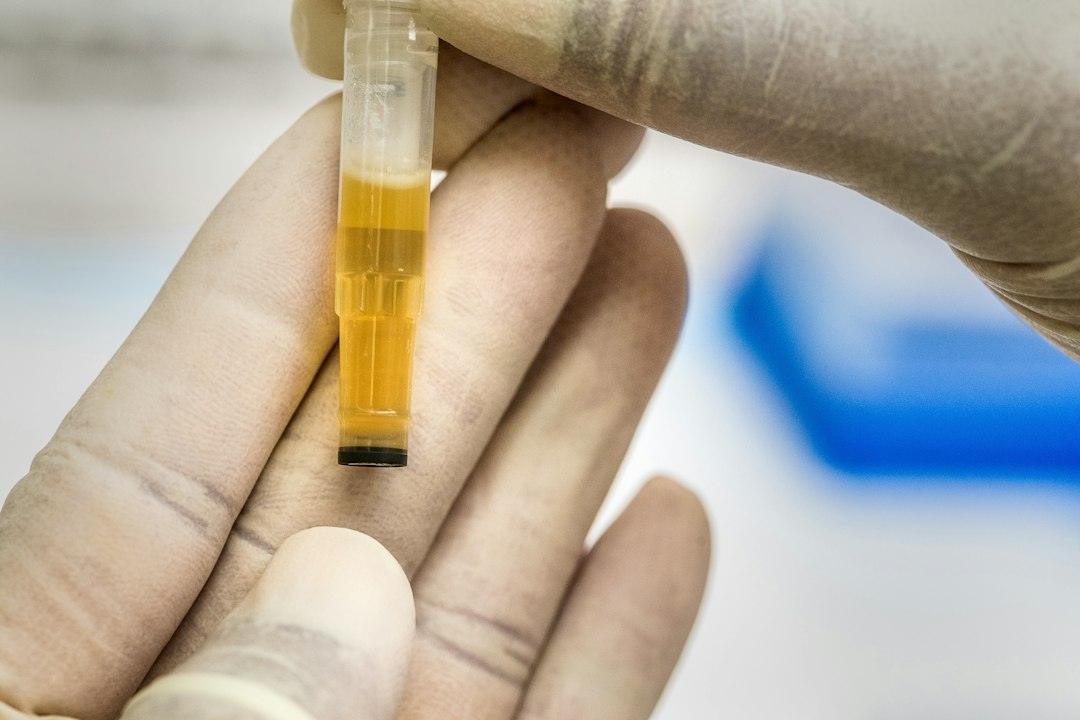
How to Reconstitute Peptides Safely and Avoid Costly Mistakes
Why Getting Peptide Reconstitution Right Matters for Your Research
Disclaimer: The information provided in this article is for educational and informational purposes only. It is not intended as medical advice, diagnosis, or treatment. Products and compounds referenced are for research use only and are not approved for human or veterinary consumption. Always consult a qualified professional regarding health or medical decisions.

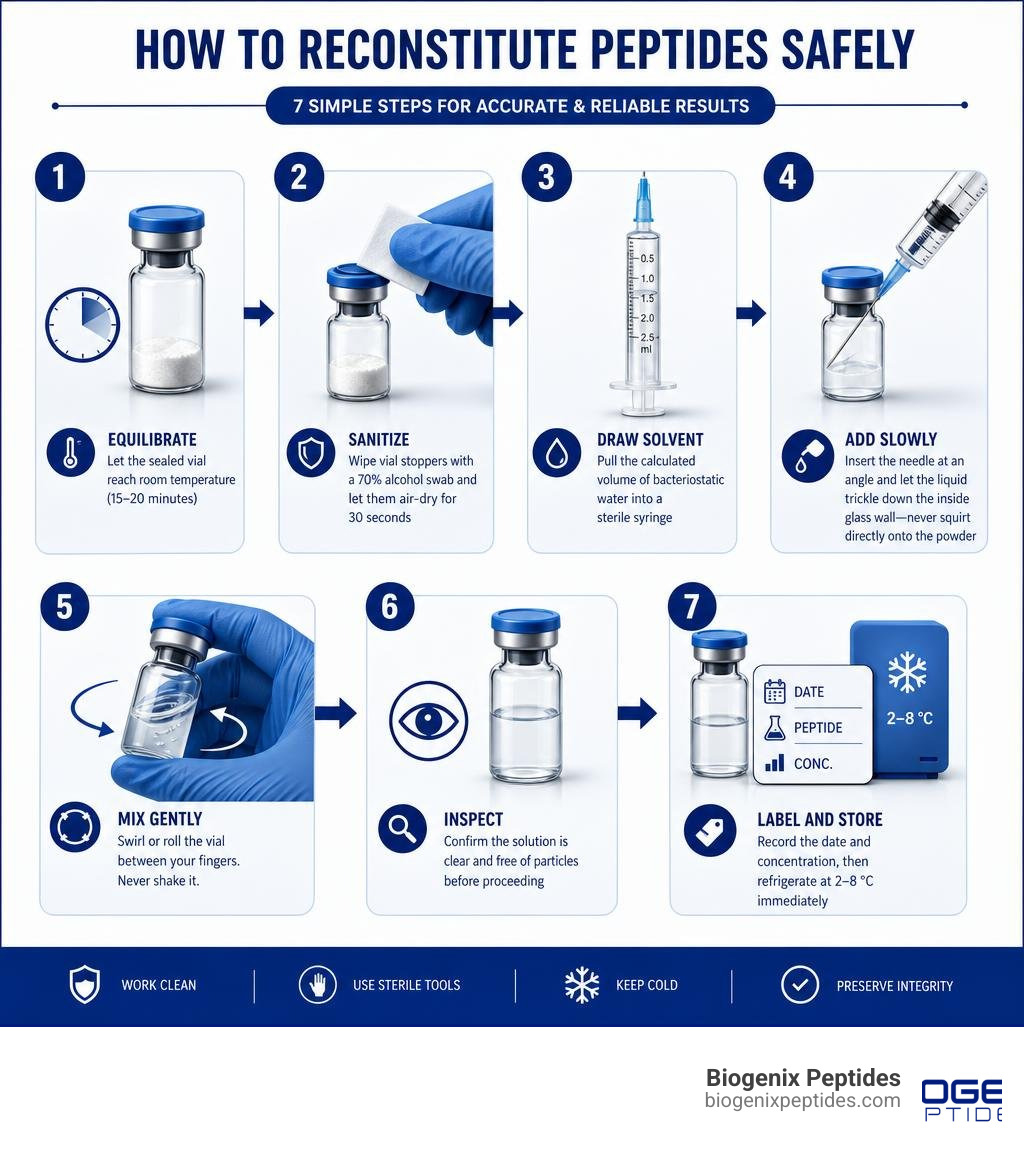
Knowing how to reconstitute peptides safely is one of the most fundamental skills in peptide research — and one of the most commonly done wrong. Here is a quick overview of the safe reconstitution process:
- Equilibrate — Let the sealed vial reach room temperature (15–20 minutes) before opening.
- Sanitize — Wipe vial stoppers with a 70% alcohol swab and let them air-dry for 30 seconds.
- Draw solvent — Pull the calculated volume of bacteriostatic water into a sterile syringe.
- Add slowly — Insert the needle at an angle and let the liquid trickle down the inside glass wall — never squirt directly onto the powder.
- Mix gently — Swirl or roll the vial between your fingers. Never shake it.
- Inspect — Confirm the solution is clear and free of particles before proceeding.
- Label and store — Record the date and concentration, then refrigerate at 2–8 °C immediately.
Most research peptides arrive as a freeze-dried (lyophilized) powder. That form is deliberately chosen — it keeps the compound stable during shipping and long-term storage. But the powder form cannot be measured or used in research applications until it is dissolved back into a liquid solution. That process is called reconstitution.
The problem? Small errors during reconstitution can degrade the peptide, compromise your results, or introduce contamination. As one widely cited principle in peptide research puts it: a peptide with 98% HPLC purity is no better than one with 90% purity if it is handled incorrectly.
This guide covers everything a researcher needs to know — solvents, technique, concentration calculations, storage, and the mistakes that quietly ruin vials.
I’m Jay Daniel, Founder and CEO of BioGenix Peptides, and my years of hands-on experience in peptide science and quality control have shown me how critical proper reconstitution technique is when researching how to reconstitute peptides safely. In the sections below, I’ll walk you through the exact protocols we rely on to protect peptide integrity from the moment a vial is opened.
What is Peptide Reconstitution and Why is it Necessary?
Peptide reconstitution is the chemical process of dissolving a lyophilized (freeze-dried) peptide powder into a compatible sterile solvent to restore it to an active, liquid state. When we receive research peptides, they are almost always in this dry, compacted cake form. Understanding Everything You Need to Know About Lyophilized Peptides begins with understanding the science of lyophilization itself.
Lyophilization is a highly controlled dehydration process. The peptide solution is frozen, and then the surrounding pressure is reduced to allow the frozen water in the material to sublime directly from the solid phase to the gas phase. This process removes up to 95-99% of moisture, leaving behind a highly stable peptide cake.
By removing water, lyophilization eliminates the primary pathways of chemical degradation:
- Hydrolysis: The chemical breakdown of a compound due to reaction with water. In liquid form, peptide bonds are highly susceptible to being cleaved by water molecules.
- Oxidation: Certain amino acids (such as methionine and cysteine) are prone to reacting with oxygen in aqueous environments, altering their molecular structure.
- Deamidation: A chemical reaction in which an amide functional group in the side chain of the amino acids asparagine or glutamine is removed or converted to another functional group, degrading the peptide’s structural integrity.
While lyophilized peptides are exceptionally stable—often remaining chemically integral for 12 to 24 months when kept sealed in a freezer at -20°C to -80°C—they are completely inert in this state. To perform laboratory evaluations, cell culture assays, or other research applications, the peptide must be returned to a liquid solution. Reconstitution is the bridge that makes the compound measurable and biochemically active once more.
Selecting the Right Solvent for Research
Choosing the correct diluent is a critical step in preserving the target peptide’s stability. Not all sterile liquids are created equal, and selecting the wrong one can drastically shorten the shelf life of your reconstituted solution.
- Bacteriostatic Water: This is the industry standard for multi-use research vials. It consists of sterile water containing 0.9% benzyl alcohol. The benzyl alcohol acts as a mild preservative that effectively inhibits the growth of bacteria and fungi. This allows researchers to perform multiple withdrawals from the same vial over an extended period.
- Sterile Water: This is highly purified, sterilized water containing no preservatives. While it is excellent for dissolving peptides, the lack of an antimicrobial agent means that once the vial is punctured, any microscopic contaminant can multiply rapidly. Consequently, sterile water is reserved strictly for single-session research protocols.
- Sodium Chloride (Sterile Saline): Normal saline (0.9% NaCl) is sometimes used when physiological osmolarity is required for specific cell assays. However, it lacks preservative properties and is only suitable for immediate or short-term application.
- Dilute Acetic Acid / DMSO: Some highly hydrophobic (water-fearing) or basic peptides do not dissolve easily in neutral water. In these advanced cases, researchers utilize a two-step reconstitution method, first dissolving the powder in a tiny amount of dilute acetic acid (0.1% to 1.0%) or dimethyl sulfoxide (DMSO) before diluting it with bacteriostatic water.
To help you choose, we have put together a comprehensive breakdown on Sterile Water and Bacteriostatic Water Differences You Must Know.
| Solvent Type | Preservative Included? | Typical Reconstituted Shelf Life (Refrigerated) | Best Used For |
|---|---|---|---|
| Bacteriostatic Water | Yes (0.9% Benzyl Alcohol) | 28 to 60 days | Multi-withdrawal research protocols |
| Sterile Water | No | 24 to 48 hours | Single-session assays, benzyl-alcohol-sensitive peptides |
| Sterile Saline (0.9% NaCl) | No | 24 hours | Short-term physiological assays |
| Dilute Acetic Acid / DMSO | No (requires aqueous dilution) | Varies by compound | Hydrophobic or basic peptides with solubility challenges |
A Guide on How Reconstitute Peptides Safely in the Lab
Maintaining absolute sterility during the reconstitution process is paramount. Because peptides are organic chains of amino acids, they can serve as a prime breeding ground for bacterial growth if contamination is introduced. A contaminated vial not only ruins the peptide’s structural integrity but also introduces unwanted variables that can invalidate your entire research project.
Applying rigorous aseptic technique is the only way to prevent contamination and ensure reproducible laboratory results. For a detailed guide on setting up your workspace, see our resource on Creating a Sterile Research Environment.
Essential Equipment Needed to Learn How Reconstitute Peptides Safely
Before beginning, gather all necessary equipment in a clean, draft-free workspace. Having everything prepared beforehand minimizes the time the vials are exposed to the open air and reduces the risk of accidental contamination.
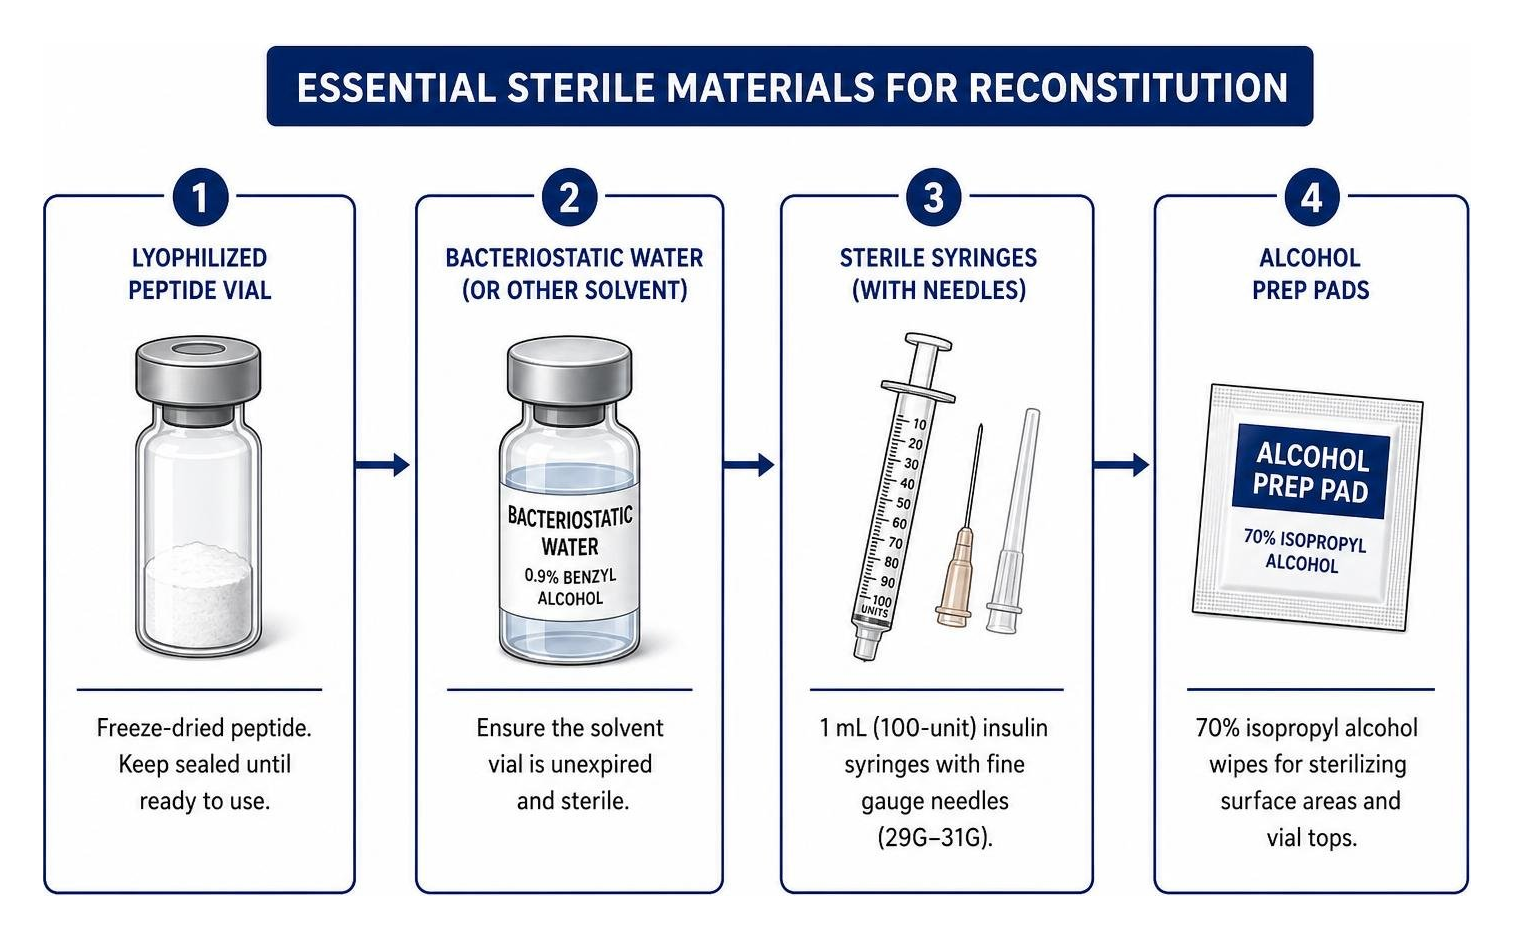
To learn how reconstitute peptides safely, you will need the following laboratory materials:
- Lyophilized Peptide Vial: The freeze-dried compound, kept sealed until the moment of preparation.
- Bacteriostatic Water (or other chosen solvent): Ensure the solvent vial is unexpired and sterile.
- Sterile Syringes: Standard 1 mL (100-unit) insulin syringes with fine-gauge needles (29G to 31G) are ideal for both drawing the solvent and measuring precise research volumes.
- Alcohol Prep Pads: 70% isopropyl alcohol wipes for sterilizing surface areas and vial tops.
- Sharps Container: For the safe disposal of all used needles and syringes.
- Nitrile Gloves: To prevent the transfer of skin oils and microbes to the sterile equipment.
For more hands-on practical tips on managing your workspace, check out our guide on Mixing Peptides at Home Like a Pro.
Step-by-Step Instructions on How Reconstitute Peptides Safely
To ensure the physical and chemical preservation of your research compound, follow this precise, step-by-step protocol. You can also cross-reference these steps with our detailed walkthrough on Reconstituting Lyophilized Peptides Step-by-Step or watch this helpful Peptide Reconstitution Instructions video.
Step 1: Temperature Equilibration
Remove the lyophilized peptide vial from cold storage (freezer or refrigerator) and let it sit on your clean workspace for 15 to 20 minutes to reach room temperature. Why this matters: Opening or puncturing a cold vial introduces warm, humid air, causing moisture condensation inside the vial. This moisture can trigger rapid hydrolysis, degrading the peptide before you even add the solvent.
Step 2: Sanitize Your Workspace and Equipment
Wash your hands thoroughly with soap and water, put on your nitrile gloves, and clean your workspace surface with disinfectant. Remove the plastic flip-top caps from both the peptide vial and the bacteriostatic water vial. Thoroughly wipe the rubber vial stoppers with a fresh 70% alcohol prep pad. Allow the alcohol to air-dry completely for 30 seconds. Why this matters: Puncturing a wet, alcohol-covered stopper can push trace amounts of rubbing alcohol into the vial, which can denature sensitive peptide chains.
Step 3: Draw the Solvent
Take a fresh, sterile syringe. Draw an volume of air into the syringe equal to the amount of bacteriostatic water you intend to withdraw. Pierce the rubber stopper of the bacteriostatic water vial, inject the air into the vial (to equalize pressure), turn the vial upside down, and slowly withdraw the calculated volume of solvent. Pull the needle out.
Step 4: Inject the Solvent Slowly
Carefully insert the syringe needle through the center of the peptide vial’s rubber stopper. Angle the needle toward the inside glass wall of the vial. Slowly depress the syringe plunger, allowing the liquid to trickle down the glass wall in a slow, gentle stream. Why this matters: Never spray the solvent directly onto the lyophilized powder cake. The mechanical force of a direct spray can shear and break the delicate bonds of the peptide chains, ruining its potency.
Step 5: Equalize the Vial Pressure
Before removing the needle, pull the plunger back slightly to draw out any excess air pressure that may have built up inside the vial from adding the liquid. This normalizes the pressure, making subsequent fluid withdrawals much easier and preventing liquid from spraying out the next time the stopper is pierced.
Step 6: Dissolve with Gentle Swirling
Withdraw the needle and discard it safely into your sharps container. Gently roll the vial between your palms or swirl it in a slow, circular motion on your flat workspace. Why this matters: Never shake or vortex the vial. Shaking creates vigorous shear forces and excessive foam, which denatures the proteins and renders the peptide inactive.
Step 7: Inspect and Label
Allow the vial to sit for 5 to 10 minutes. Inspect the solution under bright light. A successful reconstitution yields a perfectly clear, colorless liquid free of any cloudiness, floaters, or sediment. Write the peptide name, exact concentration, and the date of reconstitution on a label and stick it to the vial.
Storage, Stability, and Avoiding Common Mistakes
Once a peptide is reconstituted, its clock starts ticking. It is now far more vulnerable to environmental factors like heat, light, and physical agitation. To maximize its shelf life, you must store and handle it with care. Refer to A Foolproof Way to Reconstitute Your Lyophilized Peptides for an in-depth look at ongoing storage chemistry.
- Refrigeration is Mandatory: Reconstituted peptides must be stored in a dedicated refrigerator at 2–8 °C (36–46 °F). Never store them in the freezer once liquid has been added. Freezing a liquid solution creates sharp ice crystals that physically tear apart the delicate folded structures of the peptide chains, reducing their biological activity by 20% to 50% with every single freeze-thaw cycle.
- Protect from Light: Peptides are highly sensitive to ultraviolet light, which can cause photodegradation. Keep your vials inside their original boxes, wrap them in aluminum foil, or store them in a dark, light-tight container inside the refrigerator.
- Avoid Physical Agitation: Even when stored in the fridge, place the vials in a secure spot where they won’t be knocked over or subjected to the constant vibration of the refrigerator door opening and closing.
- Watch for Signs of Degradation: Before each research session, inspect the vial. If you notice any cloudiness, discoloration, persistent foaming, or tiny floating particles that do not dissolve with a gentle swirl, the peptide has likely degraded or become contaminated. It must be discarded immediately.
For a doctor’s perspective on visual inspection and preparing solutions safely, you can watch this video on Preparing Reconstituted Peptides or review this comprehensive Reconstitution and Storage Guide.
Calculating Concentration and Dilution Ratios
To conduct accurate, reproducible research, you must know the exact concentration of your reconstituted peptide solution. Adding more or less solvent does not change the total amount of the peptide in the vial, but it does change how concentrated the liquid is, which directly impacts the volume of fluid you need to draw for your measurements.
To find the concentration of your mixture, use this basic concentration formula:
$$\text{Concentration} = \frac{\text{Total Peptide Mass (mg)}}{\text{Total Solvent Volume (mL)}}$$
To make the math easier for laboratory measurements, we typically convert milligrams (mg) to micrograms (mcg) by multiplying by 1,000 (since $1\text{ mg} = 1,000\text{ mcg}$).
$$\text{Concentration (mcg/mL)} = \frac{\text{Total Peptide Mass (mg)} \times 1,000}{\text{Total Solvent Volume (mL)}}$$
Once you know the concentration in mcg/mL, you can easily determine how many micrograms of peptide are contained in each individual unit of a standard U-100 insulin syringe. A standard 1 mL U-100 syringe has exactly 100 unit markings, meaning each individual unit on the syringe represents exactly 0.01 mL of fluid.
$$\text{Micrograms per Syringe Unit} = \frac{\text{Concentration (mcg/mL)}}{100}$$
For a deeper dive into the chemical mathematics behind these calculations, read our detailed guide on The Science of the Bacteriostatic Water Peptide Ratio.
Practical Dilution Examples for Researchers
Let’s look at two common laboratory scenarios to see how this math works in practice.
Example 1: Reconstituting a 5mg Vial
If you have a 5 mg vial of a peptide and reconstitute it with 2 mL of bacteriostatic water:
- Convert the mass to micrograms: $$5\text{ mg} \times 1,000 = 5,000\text{ mcg}$$
- Calculate the concentration: $$\frac{5,000\text{ mcg}}{2\text{ mL}} = 2,500\text{ mcg/mL}$$
- Find the amount per syringe unit on a U-100 syringe: $$\frac{2,500\text{ mcg}}{100\text{ units}} = 25\text{ mcg per unit}$$
If your research protocol requires a target draw of 250 mcg of the peptide, you would divide your target amount by the concentration per unit: $$\frac{250\text{ mcg}}{25\text{ mcg/unit}} = 10\text{ units on the syringe (0.10 mL of liquid)}$$
For more details on this specific vial size, see The Secret to Reconstituting Peptides 5mg Correctly.
Example 2: Reconstituting a 10mg Vial
If you have a 10 mg vial of a peptide and reconstitute it with 2 mL of bacteriostatic water:
- Convert the mass to micrograms: $$10\text{ mg} \times 1,000 = 10,000\text{ mcg}$$
- Calculate the concentration: $$\frac{10,000\text{ mcg}}{2\text{ mL}} = 5,000\text{ mcg/mL}$$
- Find the amount per syringe unit: $$\frac{5,000\text{ mcg}}{100\text{ units}} = 50\text{ mcg per unit}$$
If your protocol requires a target draw of 250 mcg from this 10 mg vial, the calculation is: $$\frac{250\text{ mcg}}{50\text{ mcg/unit}} = 5\text{ units on the syringe (0.05 mL of liquid)}$$
For a specific compound example, you can read our walkthrough on BPC-157 Reconstitution Ratios Made Easy for Research.
Frequently Asked Questions about Peptide Reconstitution
Can I use sterile water instead of bacteriostatic water?
Yes, but only for single-session laboratory applications. Sterile water contains no antimicrobial preservatives. Once you puncture the rubber stopper of a sterile water mixture, any bacteria introduced to the vial will multiply rapidly.
If you use sterile water, the solution must be used within 24 hours or frozen in single-use aliquots immediately (though freezing reconstituted liquid is generally not recommended due to structural degradation). For multi-vial research protocols accessed over several weeks, pharmaceutical-grade bacteriostatic water is mandatory because its 0.9% benzyl alcohol content safely suppresses microbial growth for up to 28 days.
Why should I never shake a reconstituted peptide vial?
Peptides are delicate chains of amino acids held together by relatively weak hydrogen and disulfide bonds. Shaking, dropping, or vortexing a vial creates violent physical shear forces. These forces, along with the air bubbles generated by shaking, can easily break the peptide’s three-dimensional structure (a process called denaturation). Once a peptide is denatured, its biological activity is permanently lost. Always roll the vial gently between your palms or swirl it slowly on a flat surface to dissolve the powder.
How long do reconstituted peptides remain stable?
When reconstituted with bacteriostatic water and stored under constant refrigeration at 2–8 °C (36–46 °F), most peptides remain chemically stable for roughly 28 to 60 days. After 28 days, the antimicrobial effectiveness of the benzyl alcohol begins to decline, and the risk of contamination increases.
Additionally, some highly sensitive peptides have labile chemical bonds that naturally degrade via hydrolysis over time, even in cold storage. Always check for physical degradation signs like cloudiness, discoloration, or persistent sediment, and discard any vials that show these changes.
Conclusion
Mastering the art of safe peptide reconstitution is a fundamental requirement for anyone conducting reliable, high-quality peptide research. By maintaining a sterile environment, choosing the correct solvent, injecting diluents slowly to avoid shear damage, and storing your mixtures under strict refrigeration, you protect the structural integrity of your compounds and ensure your experimental results are accurate and reproducible.
At BioGenix Peptides, we are dedicated to supporting your research with the highest-quality materials and educational guides. To learn more about specific reconstitution protocols, check out our comprehensive BPC-157 Reconstitution Complete Guide and explore our resources to elevate your laboratory standards.