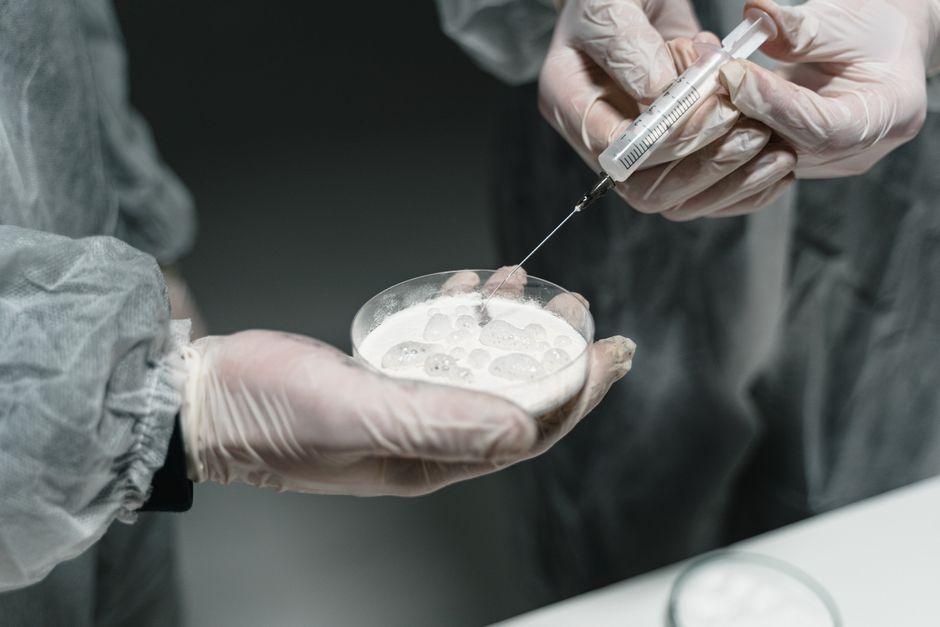
How to Master Peptide Reconstitution Steps in Less Than an Hour a Day
Disclaimer: The information provided in this article is for educational and informational purposes only. It is not intended as medical advice, diagnosis, or treatment. Products and compounds referenced are for research use only and are not approved for human or veterinary consumption. Always consult a qualified professional regarding health or medical decisions.
Start With a Controlled Peptide Reconstitution Process
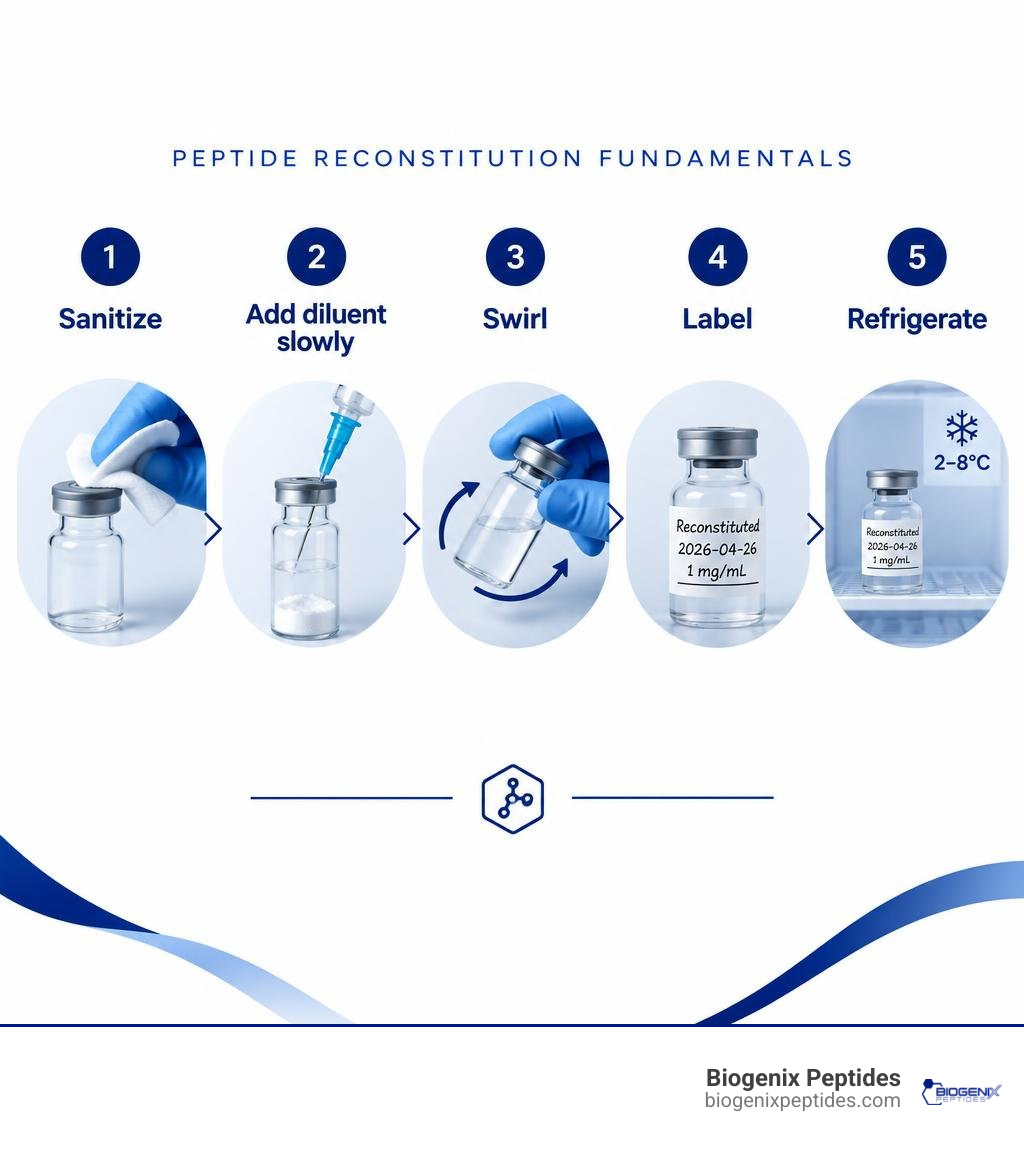
A reliable peptide reconstitution guide starts with clean technique and a validated research protocol. Sanitize the vial stoppers, transfer the specified diluent slowly down the vial wall, swirl gently until the lyophilized material dissolves, label the vial with the date and mixing ratio, and refrigerate it at 2-8 C when the material-specific instructions call for cold storage.
The key is consistency. The amount of diluent determines the final concentration and the volume measured later, while vigorous shaking, reused needles, unsuitable solvents, or poor storage can compromise a research sample. This article presents general research-handling information and should not replace a supplier’s product documentation or laboratory procedures.
I am Jay Daniel, founder and CEO of BioGenix Peptides, with hands-on experience in peptide development, sourcing, quality control, and laboratory-focused research education. In this peptide reconstitution guide, I will focus on clear, responsible practices that support precise and well-documented research workflows.
Understanding Lyophilization and Required Mixing Supplies
Handling research peptides requires an appreciation of solid-state biochemistry. Lyophilization, or freeze-drying, removes water via sublimation under high vacuum. This process leaves behind a delicate, porous disc or powder called a “cake.” Because dry peptide chains are far less susceptible to hydrolysis and thermal breakdown, researchers rely heavily on understanding why research peptides are typically lyophilized to preserve structural integrity during transit and baseline storage.
Why Peptides Require Reconstitution
In their freeze-dried state, peptide molecules remain chemically locked in place. However, analytical evaluations, spectroscopic assays, and in vitro studies require a liquid medium. Reconstitution restores the peptide to an active solution by reintroducing a sterile diluent.
Without careful fluid dynamics, the sudden introduction of liquid can create mechanical shear stresses. Peptides consist of complex amino acid sequences linked by delicate peptide bonds. Preserving these bonds requires gradual wetting of the lyophilized cake to prevent denaturation, aggregation, or fragmentation before your experimental evaluations begin.
Essential Supplies in This Peptide Reconstitution Guide
Setting up your workstation properly saves valuable laboratory time and eliminates contamination variables. Before breaking any seals, assemble these core research items:
- Lyophilized Peptide Vial: The dry research compound stored at appropriate baseline temperatures.
- Reconstitution Diluent: Typically bacteriostatic water containing an antimicrobial agent.
- Measurement Syringes: Calibrated U-100, U-50, or U-30 insulin syringes for liquid transfer to match barrel sizes to your research design.
- Sterilization Pads: 70% isopropyl alcohol wipes for wiping vial septums and preparation surfaces.
- Sharps Disposal Unit: A dedicated, puncture-resistant container for safe laboratory waste management.
- Permanent Marker: For noting reconstitution dates, concentrations, and lot numbers on vial labels.
Bacteriostatic Water vs Sterile Water: Selecting the Right Diluent
Choosing the proper diluent is one of the most critical decisions in liquid handling. The choice dictates whether a vial remains stable over multiple samplings or degrades rapidly due to bacterial proliferation.
Bacteriostatic water (often abbreviated as BAC water) consists of sterile water containing 0.9% benzyl alcohol ($C7H8O$). This organic additive acts as a bacteriostat, inhibiting the growth of airborne or surface-introduced bacteria. When an analytical protocol requires repeatedly accessing the same vial over several days or weeks, bacteriostatic water provides necessary preservation for up to 28 days under refrigeration.
In contrast, sterile water contains no preservative. Once the rubber septum of a sterile water vial is pierced, atmospheric microbes can enter, creating a potential bacterial bloom within hours. Therefore, sterile water is suited strictly for single-instance applications where the entire liquid volume is consumed immediately. Understanding the sterile water and bacteriostatic water differences protects research integrity and prevents costly experimental spoilage.
| Feature | Bacteriostatic Water | Sterile Water |
|---|---|---|
| Composition | Sterile water + 0.9% benzyl alcohol | Pure sterile water ($H_2O$) |
| Antimicrobial Action | Inhibits bacterial replication | None |
| Access Profile | Multi-entry research protocols | Single-entry protocols only |
| Refrigerated Stability | Up to 28 days after puncture | Discard immediately after opening |
| Primary Research Application | Extended multi-sample workflows | Immediate single-point assay preparation |
The Complete Peptide Reconstitution Guide: Step-by-Step Walkthrough
Achieving reproducible research outcomes requires a meticulous, standardized protocol. Maintain a sterile research field throughout the process by creating a sterile research environment and following these sequential steps:
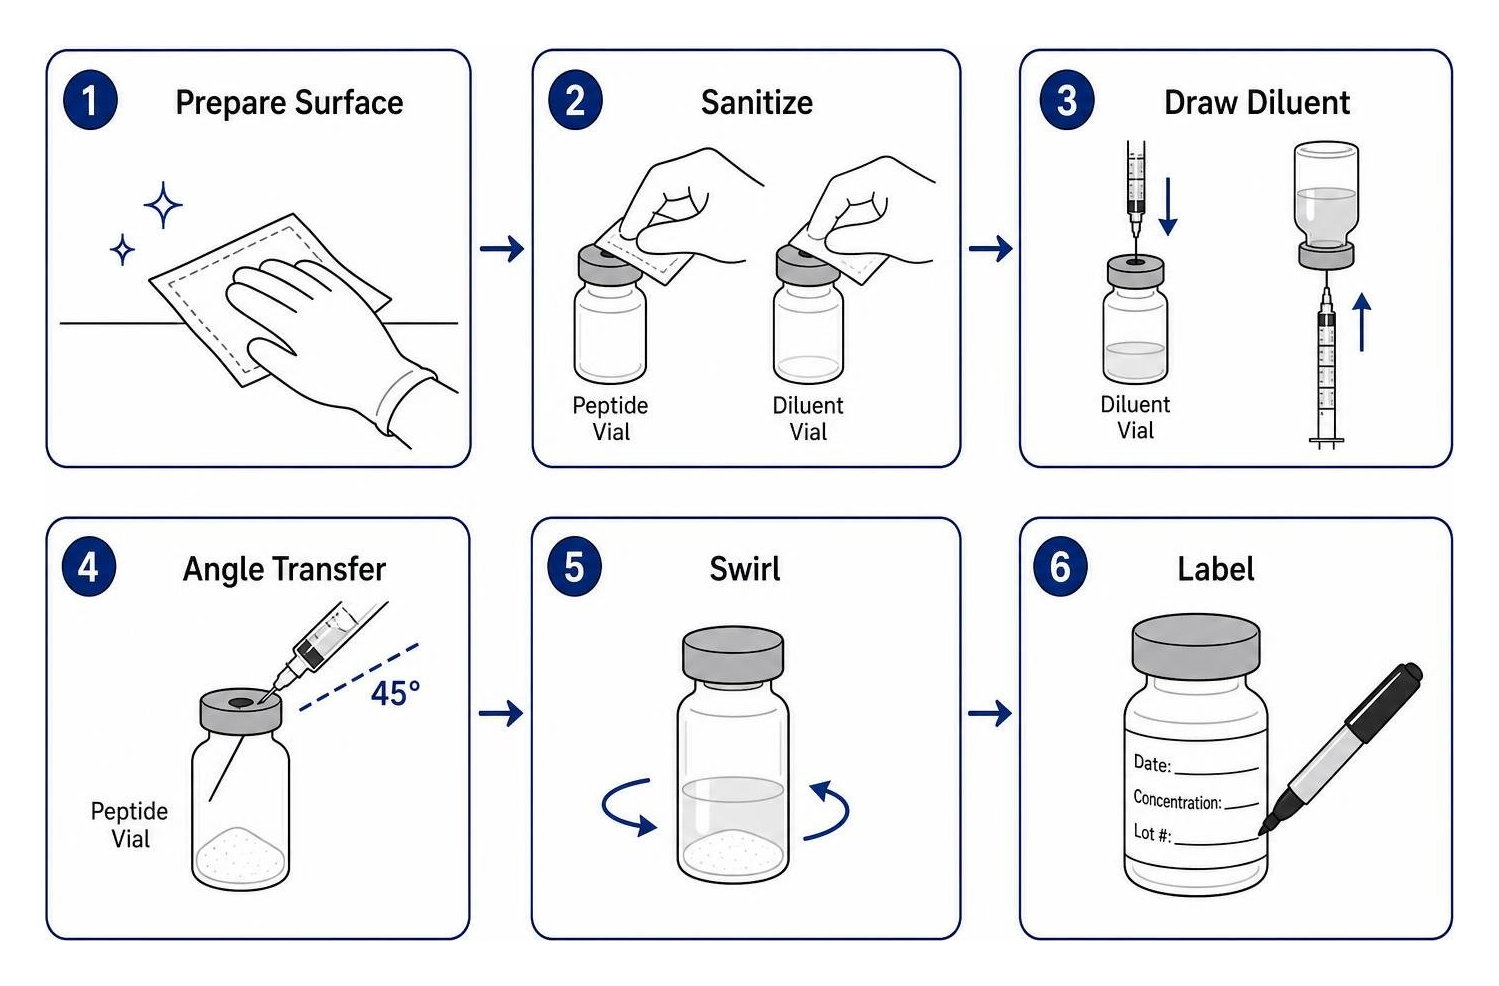
- Prepare the Workspace: Disinfect a non-porous countertop or laminar flow bench using 70% isopropyl alcohol. Allow the surface to air-dry completely. Wash hands thoroughly and put on clean laboratory gloves.
- Sanitize the Vials: Pop the plastic flip-off caps from both the peptide vial and the bacteriostatic water vial. Thoroughly scrub the exposed rubber septums with a fresh alcohol wipe for 15 seconds. Allow the alcohol to evaporate naturally—never blow on the septum to speed up drying.
- Draw the Diluent: Uncap a sterile syringe. Pull the plunger back to draw an amount of air equal to your intended diluent volume (for example, 2.0 mL). Insert the needle straight through the center of the bacteriostatic water stopper, push the air into the vial to equalize pressure, invert the vial, and smoothly draw the exact liquid volume required.
- Manage Vial Vacuum: Lyophilized peptide vials are often sealed under partial vacuum. Gently insert the diluent-filled needle through the peptide vial’s rubber septum at a 45-degree angle. Rest the needle tip against the inside glass wall rather than pointing it directly downward into the powder.
- Control Fluid Transfer: Allow the vacuum to slowly pull the liquid in, or manually depress the plunger at a slow, controlled rate so the diluent streams down the glass wall. If the vacuum pulls too hard, hold back the plunger with your thumb to prevent a violent jet of liquid from impacting the cake.
- Equalize Internal Pressure: Before withdrawing the needle, pull the plunger back slightly to remove any excess air pressure if needed, then remove the syringe and immediately place it into your sharps container.
- Dissolve the Peptide: Gently rotate and swirl the vial between your fingers. Do not shake, invert violently, or agitate the solution. Allow the vial to rest on your clean workspace for 5 to 15 minutes to allow complete, natural dissolution. For external verification protocols, see validated step-by-step reconstitution protocols.
- Label and Store: Affix a label to the vial noting the date, diluent volume, and calculated concentration. Transfer the reconstituted solution to dark, refrigerated storage between 2 °C and 8 °C (36 °F to 46 °F).
Concentration Mathematics: Calculating Syringe Units and Concentrations
Precision in quantitative measurements depends on mastering volumetric concentration formulas. In laboratory research, concentrations are expressed as milligrams per milliliter (mg/mL) or micrograms per milliliter (mcg/mL), where $1\text{ mg} = 1,000\text{ mcg}$.
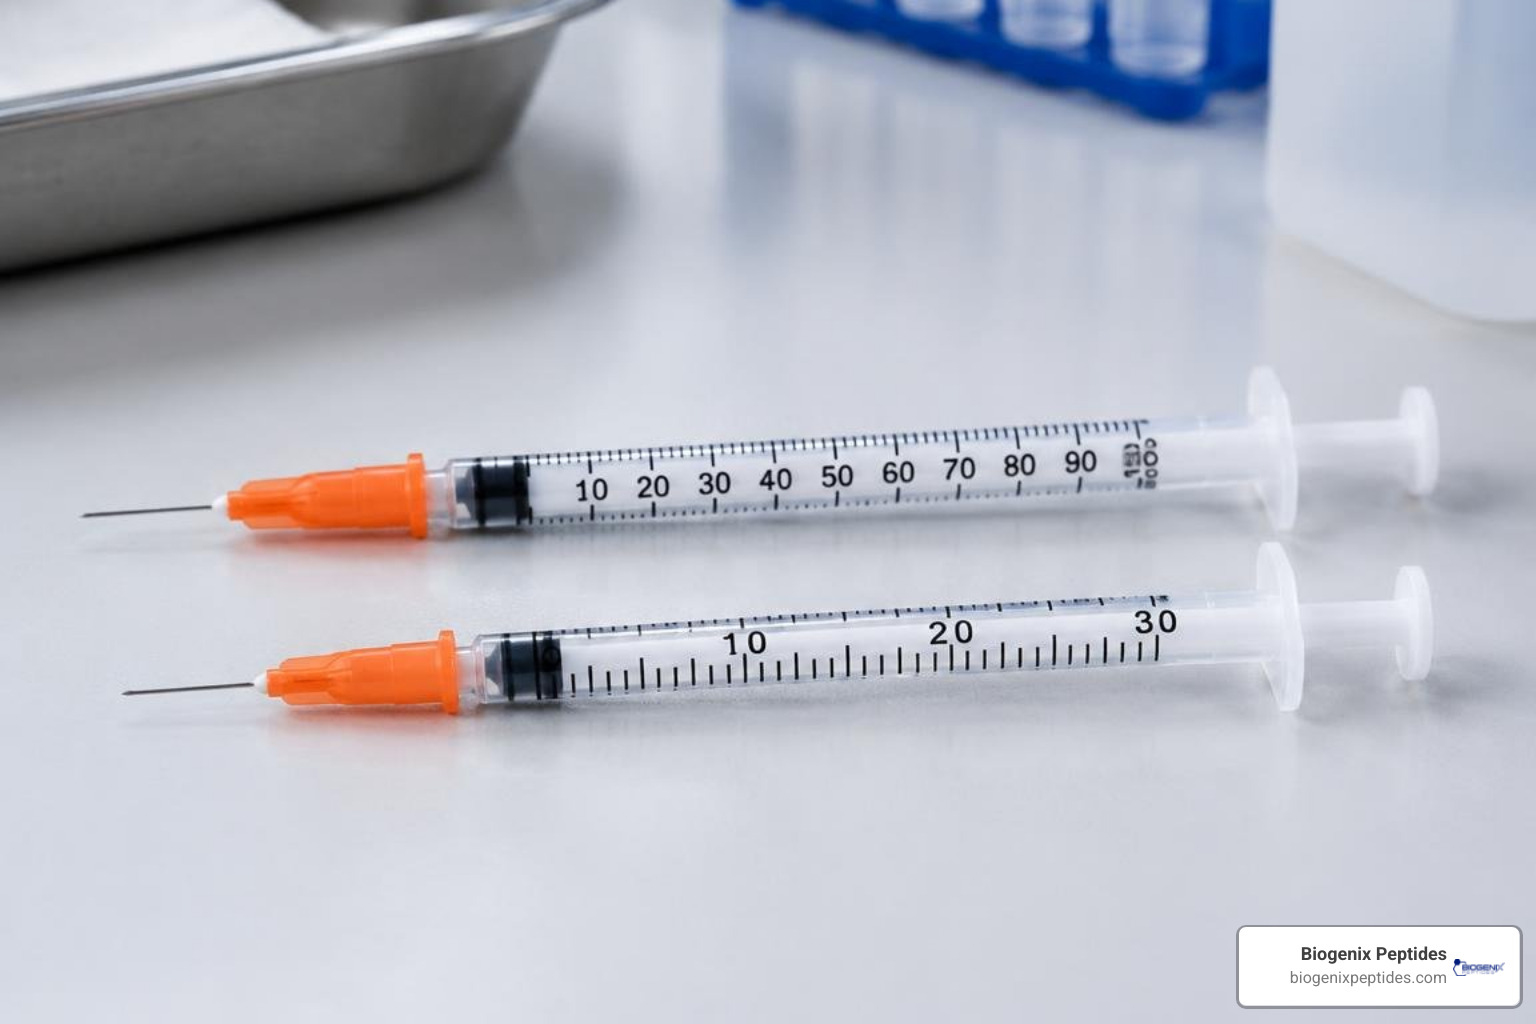
On standard U-100 insulin syringes, the volumetric calibration is universal: $100\text{ units} = 1.0\text{ mL}$. Therefore, each individual unit mark represents exactly $0.01\text{ mL}$. This mathematical equivalence holds true whether utilizing a 1.0 mL (U-100), 0.5 mL (U-50), or 0.3 mL (U-30) barrel size.
To calculate the concentration of your research solution:
$$\text{Concentration (mg/mL)} = \frac{\text{Total Peptide Mass (mg)}}{\text{Total Diluent Volume (mL)}}$$
To find the microgram yield per individual syringe unit:
$$\text{Micrograms per Unit (mcg/unit)} = \frac{\text{Concentration (mg/mL)} \times 1,000}{100\text{ units}}$$
For example, when preparing a 5 mg research vial with 2.0 mL of bacteriostatic water:
- $\text{Concentration} = \frac{5\text{ mg}}{2.0\text{ mL}} = 2.5\text{ mg/mL}$
- $2.5\text{ mg/mL} = 2,500\text{ mcg/mL}$
- $\text{Yield per Unit} = \frac{2,500\text{ mcg}}{100\text{ units}} = 25\text{ mcg per unit}$
If an analytical procedure requires extracting a 250 mcg sample aliquot:
- $\text{Volume to Draw} = \frac{250\text{ mcg}}{25\text{ mcg/unit}} = 10\text{ units (0.10 mL)}$
Using a smaller U-30 (0.3 mL) barrel spreads tiny volumes across wider linear markings, minimizing visual parallax errors when drawing small aliquots. For deeper computational examples, explore our guide on standard BPC-157 reconstitution ratio benchmarks.
Vial Longevity and Error Prevention Protocols
Once reconstituted, peptide chains transition from a stable dry lattice into a hydrated environment where thermodynamic forces, enzymatic traces, and light exposure promote gradual degradation. Establishing strict handling procedures safeguards your experimental timeline.
Peptide Reconstitution Guide for Long-Term Storage and Stability
Most reconstituted research peptides exhibit a stability window of approximately 28 days when preserved at 2 °C to 8 °C (36 °F to 46 °F). Freezing reconstituted solutions is generally discouraged in laboratory settings because ice crystal formation during freeze-thaw cycles causes mechanical shear that cleaves peptide backbones.
To maximize experimental shelf life:
- Maintain consistent refrigeration and avoid storing vials in refrigerator door compartments, which experience frequent temperature fluctuations.
- Protect light-sensitive sequences from ultraviolet and direct ambient light by utilizing amber storage containers or dedicated vial storage boxes.
- Review our comprehensive peptide storage stability guidelines for extended stability metrics.
Critical Mistakes That Denature Peptides
Peptides are fragile macromolecular structures. Avoiding common procedural missteps ensures reproducible experimental outcomes. For a comprehensive review, see our overview on avoiding costly peptide reconstitution mistakes.
- Vigorous Shaking: Never shake a peptide vial. Shaking creates froth and introduces mechanical shear forces that disrupt tertiary structures. Always swirl gently.
- Direct Stream Impact: Never squirt diluent directly onto the lyophilized cake. Forcing liquid straight onto the powder can degrade delicate structural bonds. Always stream diluent along the glass wall.
- Reusing Needles: Needles dull instantly after a single puncture and introduce biological contaminants into the master solution. Use a fresh, sterile needle for every individual draw.
- Incorrect Diluents: Substituting non-sterile water, tap water, or improper buffers alters pH and ionic strength, resulting in immediate peptide precipitation.
Frequently Asked Questions about Peptide Reconstitution
Can I use sterile saline instead of bacteriostatic water?
Sterile 0.9% sodium chloride (saline) is an isotonic salt solution that dissolves many hydrophilic compounds. However, standard sterile saline lacks an antimicrobial preservative such as benzyl alcohol. If you puncture a saline-reconstituted vial multiple times over an extended testing window, the risk of bacterial contamination increases significantly after the initial draw. For multi-entry protocols, bacteriostatic water remains the gold standard in research settings.
What should I do if the peptide looks cloudy after mixing?
Some hydrophobic peptides require several minutes to fully integrate into solution and may initially appear hazy. Allow the vial to rest undisturbed in a refrigerator for 20 to 30 minutes. If persistent cloudiness, flocculation, or visible particulate matter remains after this rest period, the peptide may have precipitated due to pH mismatch, degradation, or insolubility. Do not use a cloudy or precipitated sample in analytical assays; consult your supplier’s certificate of analysis for solubility recommendations.
How long does a reconstituted peptide vial remain stable?
Under continuous refrigeration at 2 °C to 8 °C, solutions prepared with bacteriostatic water generally retain acceptable experimental viability for roughly 28 days. After this window, the antimicrobial efficacy of the benzyl alcohol declines and chemical hydrolysis reduces peptide purity. Solutions that change color, exhibit cloudiness, or develop floating particulate matter should be discarded immediately.
Conclusion
Mastering laboratory reconstitution fundamentals is essential for research reproducibility, chemical stability, and quantitative accuracy. By maintaining a clean workspace, selecting bacteriostatic water for multi-entry workflows, utilizing precise volumetric mathematics, and preventing mechanical shear, researchers can reliably protect their valuable compounds.
At Biogenix Peptides, we are committed to providing premium, highly purified compounds backed by analytical verification to support your scientific endeavors. To explore compound-specific protocols and further refine your laboratory procedures, review our complete BPC-157 reconstitution guide to elevate your research standards today.