How to Reconstitute Peptides Safely and Avoid Common Mistakes
Disclaimer: The information provided in this article is for educational and informational purposes only. It is not intended as medical advice, diagnosis, or treatment. Products and compounds referenced are for research use only and are not approved for human or veterinary consumption. Always consult a qualified professional regarding health or medical decisions. This content reflects general educational opinion only and is intended for laboratory research contexts.
To reconstitute peptides safely, allow the lyophilized peptide vial and diluent to reach room temperature, sanitize both vial stoppers with 70% isopropyl alcohol, and slowly dispense the diluent down the inside glass wall of the vial rather than spraying directly onto the powder cake. Finally, gently swirl or roll the vial until fully dissolved without shaking, and refrigerate the reconstituted solution at 2-8 °C.
Understanding Lyophilization and Reconstitution Diluents
Peptides synthesized for laboratory evaluation typically arrive as a lyophilized cake or powder. Lyophilization, or freeze-drying, removes water through sublimation under a deep vacuum. This process preserves delicate peptide bonds that would otherwise degrade rapidly in aqueous media at ambient temperatures. Because vials are sealed under negative pressure or an inert gas blanket, introducing fluid requires methodical handling to preserve molecular integrity.
The choice of reconstituting liquid depends entirely on the experimental design. For long-term multi-aliquot investigations, bacteriostatic water is the standard diluent. Bacteriostatic water consists of non-pyrogenic sterile water containing 0.9% (9 mg/mL) benzyl alcohol. This additive acts as a bacteriostat, preventing microbial proliferation when a vial septum is accessed repeatedly across several weeks, as documented in research on benzyl alcohol preservation efficacy.
In contrast, sterile water for laboratory preparation lacks a preservative agent. While it dissolves lyophilized cakes effectively, any vial reconstituted with pure sterile water remains vulnerable to contamination after the initial puncture. Understanding the key differences between sterile water and bacteriostatic water ensures researchers do not compromise multi-week trial batches. Standard saline (0.9% sodium chloride) can also be used for select assays, but the presence of ionic salts may cause salting-out precipitation or alter the solubility profile of hydrophobic peptide sequences.
Essential Equipment Needed for How to Reconstitute Peptides Safely
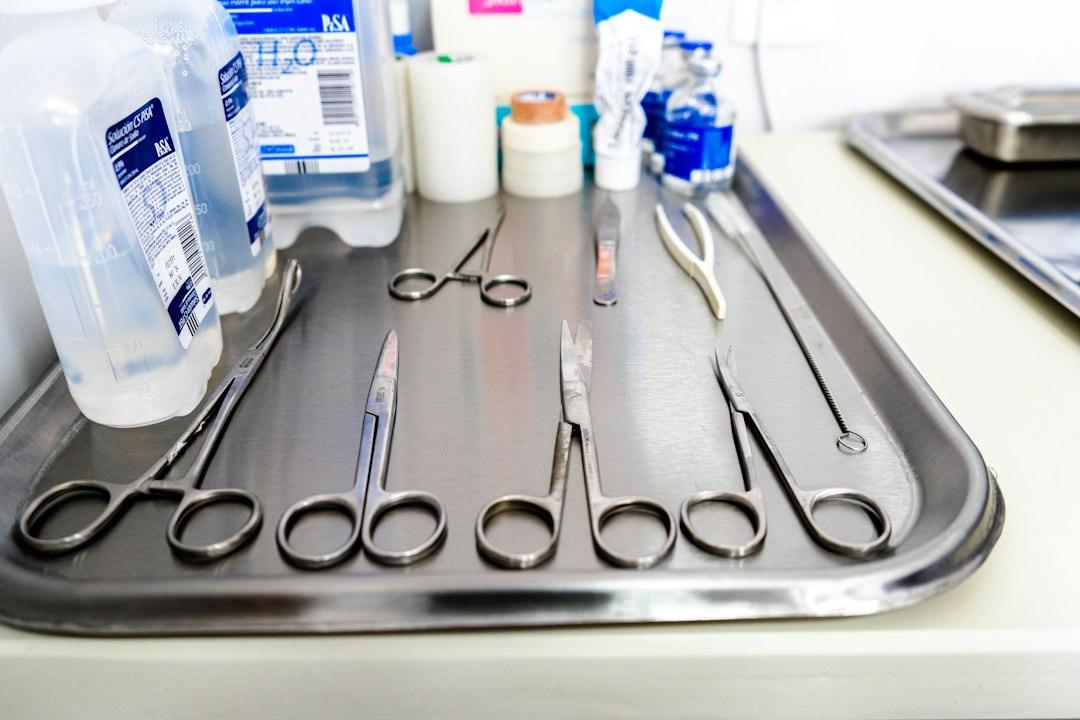
Executing a sterile, accurate reconstitution requires assembling all analytical tools before unsealing any containers. Preparing your workspace eliminates unnecessary delays and reduces exposure to environmental contaminants.
- Lyophilized Peptide Vial: Intact vial containing the freeze-dried cake.
- Reconstitution Diluent: High-purity bacteriostatic water or sterile laboratory diluent.
- Reconstitution Syringe & Needle: A 3 mL syringe paired with a 21-gauge to 25-gauge needle (1 to 1.5 inches) for drawing and transferring diluent smoothly.
- Measurement Syringes: Standard U-100 insulin syringes (0.3 mL, 0.5 mL, or 1.0 mL) calibrated with distinct unit tick marks for precise micro-volume sampling.
- Alcohol Prep Pads: 70% isopropyl alcohol wipes for thorough septum disinfection.
- Sharps Disposal Container: Dedicated puncture-resistant receptacle for safe laboratory waste management.
Maintaining rigorous protocol standards begins with creating a sterile research environment by wiping down all benchtops, wearing fresh nitrile gloves, and avoiding direct contact with rubber septums once sanitized.
Step-by-Step Protocol: How to Reconstitute Peptides Safely in a Research Setting
Proper reconstitution requires patience and deliberate mechanical control. Lyophilized peptide structures are fragile and susceptible to physical degradation if liquid is introduced too aggressively. Following validated procedures for reconstituting lyophilized powder protects your laboratory samples.
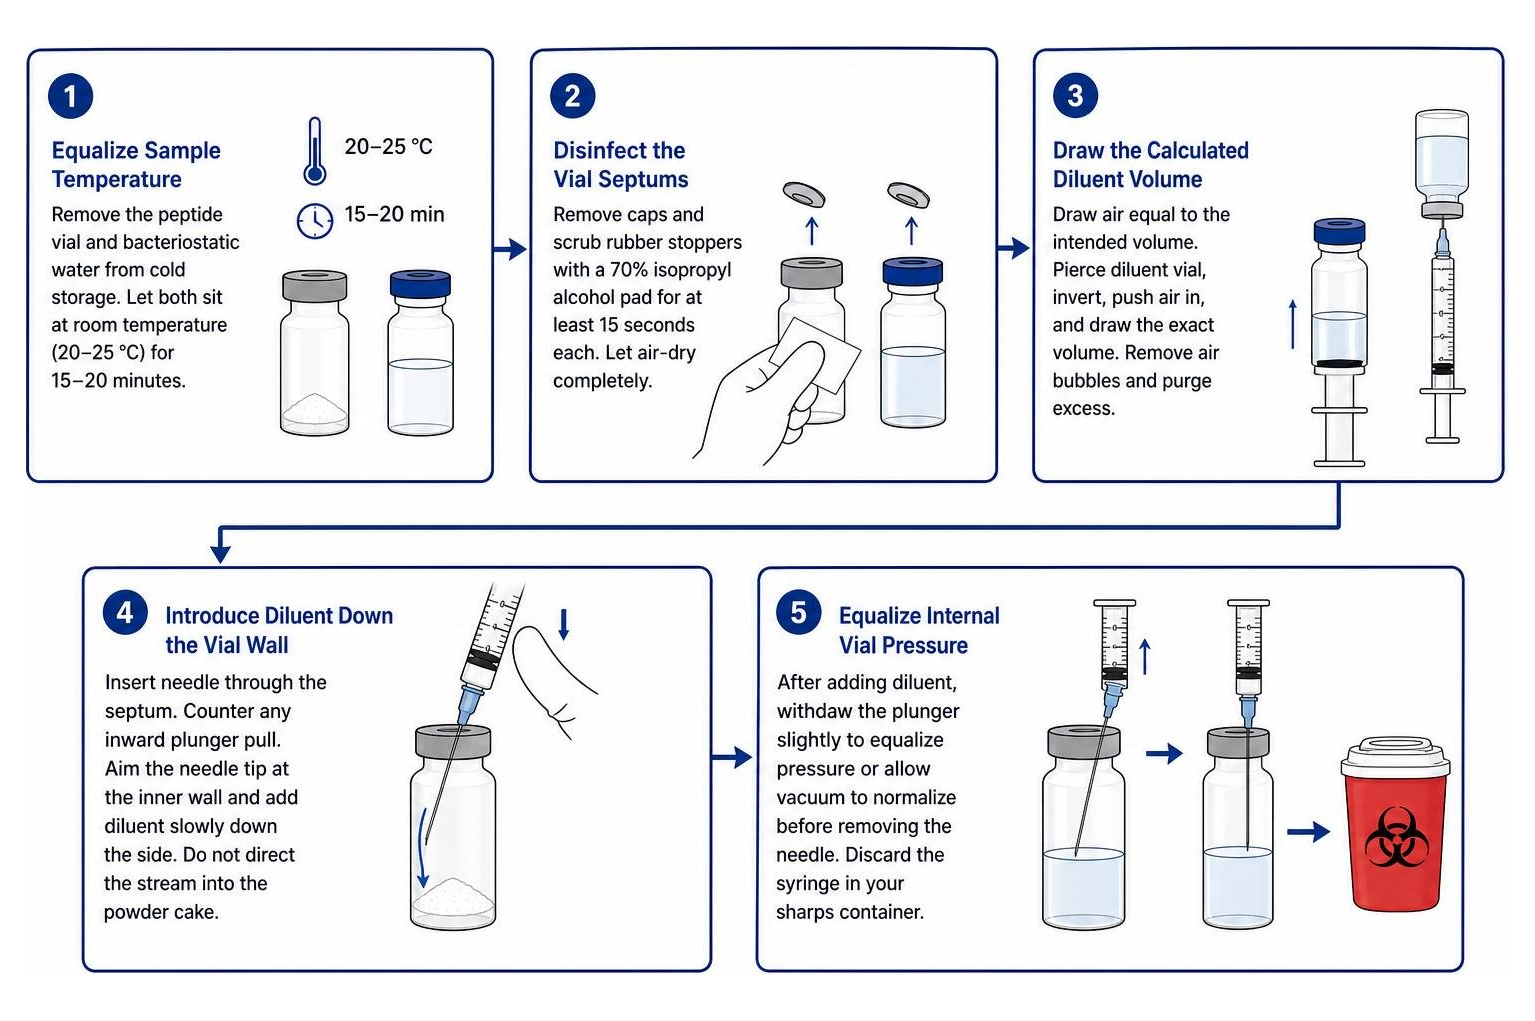
- Equalize Sample Temperature: Remove the lyophilized peptide vial and the bacteriostatic water from cold storage. Allow them to sit at room temperature (20-25 °C) for roughly 15 to 20 minutes. Introducing cold diluent to cold powder can slow dissolution and create thermal condensation.
- Disinfect the Vial Septums: Pop off the protective plastic flip-caps from both the peptide vial and the diluent vial. Thoroughly scrub the exposed rubber stoppers using a fresh 70% isopropyl alcohol pad for at least 15 seconds each. Allow the surfaces to air-dry completely; do not blow air on the stoppers, as this introduces airborne microbes.
- Draw the Calculated Diluent Volume: Using your larger reconstitution syringe (e.g., 3 mL capacity), pull back the plunger to fill the barrel with air equal to your intended diluent volume (e.g., 2 mL). Pierce the bacteriostatic water vial stopper at a 90-degree angle, invert the vial, depress the air to equalize pressure, and draw the exact volume of liquid needed. Check for air bubbles, flick the barrel gently to displace them to the top, and purge any excess back into the diluent vial.
- Introduce Diluent Down the Vial Wall: Insert the needle through the center of the peptide vial’s rubber stopper. Because many lyophilized vials maintain an internal vacuum, the plunger may pull inward automatically. Counter this pull with your thumb. Maintain backpressure and guide the needle tip toward the inner glass wall of the vial. Release the diluent drop-by-drop or in a slow, steady stream down the side of the glass. Never aim the fluid jet directly into the center of the lyophilized powder cake.
- Equalize Internal Vial Pressure: Once the diluent is transferred, gently withdraw the plunger slightly to draw out excess air if the vial is pressurized, or allow the internal vacuum to normalize before pulling the needle entirely free from the septum. Discard the mixing syringe into your sharps container.
- Dissolve via Gentle Agitation: Do not shake the vial. Hold the vial between your thumb and forefinger and swirl it in slow, circular motions. Alternatively, roll the vial between the palms of your hands. Allow the vial to rest undisturbed for 5 to 10 minutes until the solution achieves complete optical clarity.
Best Practices and How to Reconstitute Peptides Safely Without Denaturing
Peptides consist of specific sequences of amino acids joined together by peptide bonds, arranged in precise secondary and tertiary conformations. These delicate spatial structures can be broken by excessive mechanical force, a phenomenon known as shear-induced denaturation. Implementing established methods for preventing peptide denaturation ensures the biomolecules retain their intended analytical characteristics.
- Avoid Direct Impact: High-velocity liquid streams generate turbulence and cavitation bubbles that can sever sensitive peptide bonds. Flowing fluid down the glass wall buffers the kinetic energy.
- Eliminate Vigorous Shaking: Shaking introduces air-liquid interfaces where hydrophobic residues aggregate, leading to foam formation and irreversible clumping. Swirling provides sufficient kinetic mixing without shear stress.
- Verify Solution Homogeneity: Examine the liquid under direct light. A fully dissolved peptide solution should be transparent, particulate-free, and clear. If slight cloudiness persists, let the vial sit refrigerated for 30 minutes to permit gradual passive dissolution rather than forcing it with physical agitation.
Reconstitution Calculations, Dilution Ratios, and Syringe Unit Math
Accurate mathematical translation from gross mass (milligrams) to liquid concentration (micrograms per milliliter or syringe unit) is critical for experimental precision. Because insulin syringes utilize a volumetric scale based on the U-100 standard (where 100 units = 1.0 mL), calculating your diluent addition determines the physical unit volume of each research aliquot.
Understanding calculating the optimal bacteriostatic water peptide ratio allows you to select a diluent volume that lands cleanly on syringe tick marks without overfilling the vial.
Fundamental Math Formulas
To convert milligrams to micrograms, multiply the mass in milligrams by 1,000.
To calculate the resulting solution concentration, divide the total peptide mass in micrograms by the diluent volume in milliliters.
To determine the concentration per single unit on a U-100 syringe, divide the concentration in micrograms per milliliter by 100.
To find how many units to draw for a target experimental amount, divide the target mass in micrograms by the concentration per unit in micrograms per unit.
| Vial Peptide Mass | Added Bacteriostatic Water | Final Concentration | Concentration per U-100 Unit | Target Research Amount | Units on U-100 Syringe |
|---|---|---|---|---|---|
| 5 mg (5,000 mcg) | 2.0 mL | 2.5 mg/mL (2,500 mcg/mL) | 25 mcg / unit | 250 mcg | 10 units |
| 5 mg (5,000 mcg) | 2.5 mL | 2.0 mg/mL (2,000 mcg/mL) | 20 mcg / unit | 200 mcg | 10 units |
| 10 mg (10,000 mcg) | 2.0 mL | 5.0 mg/mL (5,000 mcg/mL) | 50 mcg / unit | 1,000 mcg (1.0 mg) | 20 units |
| 10 mg (10,000 mcg) | 3.0 mL | 3.33 mg/mL (3,333 mcg/mL) | 33.33 mcg / unit | 2,000 mcg (2.0 mg) | 60 units |
| 2 mg (2,000 mcg) | 2.0 mL | 1.0 mg/mL (1,000 mcg/mL) | 10 mcg / unit | 100 mcg | 10 units |
Common Research Measurement and Unit Conversions
- 5 mg Vial with 2 mL Diluent: Adding 2 mL of bacteriostatic water to a 5 mg vial yields 2.5 mg/mL (25 mcg per unit). An analytical sample requiring 250 mcg corresponds to 10 units on a standard U-100 syringe barrel.
- 5 mg Ipamorelin with 2 mL Diluent: Reconstituting 5 mg with 2 mL yields 25 mcg per unit. Measuring a 200 mcg target requires drawing exactly 8 units.
- 10 mg TB-500 with 3 mL Diluent: Adding 3 mL of bacteriostatic water results in 3.33 mg/mL. A 2.0 mg test quantity equals 60 units on a 1 mL U-100 syringe.
- 2 mg CJC-1295 with 2 mL Diluent: Yields a concentration of 1.0 mg/mL (10 mcg per unit). A 100 mcg sample volume aligns with the 10-unit line.
- 10 mg Tesamorelin with 2 mL Diluent: Produces 5.0 mg/mL (50 mcg per unit). A 1.0 mg analytical sample requires drawing 20 units.
Selecting smaller syringe barrels improves visual accuracy. If measuring small volumes (e.g., under 15 units), a 0.3 mL (30-unit) or 0.5 mL (50-unit) U-100 syringe spreads out individual tick marks across the barrel, making microscopic fractions significantly easier to read.
Post-Reconstitution Handling, Storage, and Stability Guidelines
Once dissolved in an aqueous solution, peptides become far more vulnerable to hydrolytic cleavage, oxidation, and microbial degradation. Implementing strict storage parameters preserves baseline integrity throughout experimental series.
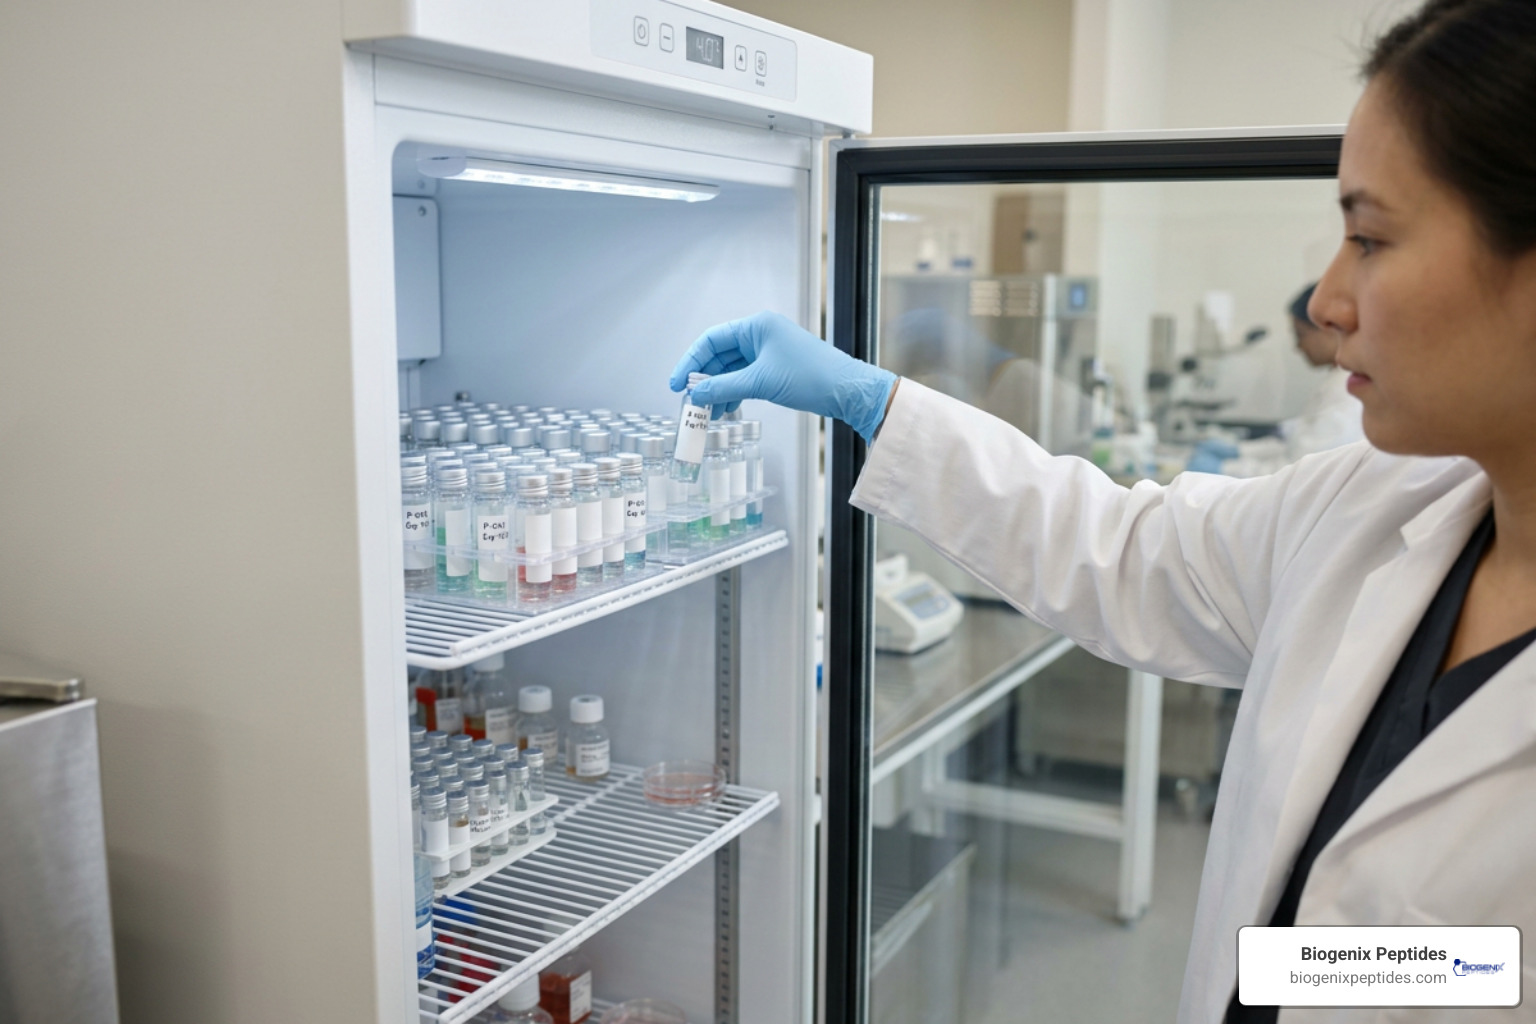
- Maintain Tight Temperature Regulation (2–8 °C): Reconstituted solutions should be refrigerated immediately at 2–8 °C (36–46 °F). Do not store vials inside refrigerator door compartments, where frequent opening exposes them to temperature fluctuations. Place them on an interior shelf near the back.
- Shield from Photodegradation: Ultraviolet and broad-spectrum artificial light accelerate photo-oxidation in amino acids containing aromatic rings (such as tryptophan, tyrosine, and phenylalanine). Store vials in opaque outer boxes, dedicated storage sleeves, or amber glass containers.
- Adhere to Shelf-Life Timelines: Reconstituted with bacteriostatic water and held at 2–8 °C, most peptide solutions maintain stability for up to 28 days. Reviewing definitive timelines for reconstituted peptide shelf life helps avoid utilizing degraded materials.
- Avoid Repeated Freeze-Thaw Cycles: Freezing an already reconstituted solution in bacteriostatic water is generally discouraged. Water expansion during freezing creates ice crystal shear that shears peptide chains, while the presence of benzyl alcohol lowers the freezing point and alters stability dynamics. If extended storage is mandatory, aliquot the solution immediately upon reconstitution into single-use cryogenic microcentrifuge tubes before initial freezing at -20 °C or -80 °C.
Critical Mistakes to Avoid During Peptide Reconstitution
Small technical missteps can quickly invalidate an entire study batch. Being aware of top mistakes made during peptide research helps preserve valuable testing materials:
- Violent Agitation: Shaking a vial creates turbulence that shears tertiary peptide structures, causing irreversible denaturation and loss of activity.
- Direct Core Diluent Addition: Forcing a high-velocity stream of diluent directly into the middle of the lyophilized cake physically degrades sensitive molecules.
- Selecting Non-Preserved Diluent for Extended Work: Using unpreserved sterile water for a multi-week trial allows bacterial proliferation after the initial puncture.
- Neglecting Temperature Equilibration: Adding ice-cold bacteriostatic water directly to frozen powder causes thermal shock and incomplete dissolution.
- Needle Coring: Inserting dull or improperly angled needles can slice small fragments of the rubber stopper into the solution, contaminating the sample with particulate matter. Always inspect the septum and enter smoothly at a perpendicular angle.
- Ambient Temperature Neglect: Leaving reconstituted liquid sitting on a warm laboratory bench accelerates hydrolysis. Return working vials to 2–8 °C storage immediately after sampling.
Frequently Asked Questions About Peptide Reconstitution
Can Sterile Water Replace Bacteriostatic Water for Multi-Sample Research?
Sterile water should not replace bacteriostatic water in multi-puncture research protocols. Sterile water lacks antimicrobial preservatives; once the vial’s rubber seal is pierced, ambient airborne micro-organisms can enter the vial. In a nutrient-rich aqueous environment, microbial colonies can develop rapidly. Sterile water is acceptable only if the entire volume of reconstituted solution is evaluated in a single, immediate protocol.
How Do You Accurately Convert Milligrams to Micrograms on a U-100 Syringe?
Conversion relies on the metric standard where 1 milligram (mg) equals 1,000 micrograms (mcg). To establish syringe units, calculate total volume concentration by dividing the total micrograms by the milliliters of diluent. Because a standard U-100 syringe contains 100 graduation units per milliliter, divide your concentration per milliliter by 100 to find the microgram value per tick mark. Finally, divide your target mass in micrograms by the value per unit to identify the exact line to pull on the barrel.
What Should You Do if a Peptide Solution Remains Cloudy After Reconstitution?
If a solution appears cloudy, opalescent, or displays suspended particles after the initial swirl, do not agitate it violently. Place the vial inside a 2–8 °C refrigerator for 30 to 60 minutes to permit passive dissolution. Some hydrophobic sequences require additional time to reach thermodynamic equilibrium in aqueous diluent. If the solution remains cloudy after several hours, it may indicate peptide aggregation, improper pH solubility, or structural precipitation. In such instances, the batch should not be utilized for analytical procedures.
Conclusion
Mastering safe peptide reconstitution requires strict sterile technique, careful handling, and accurate volumetric math. By using validated bacteriostatic diluents, directing liquid slowly down the glass wall, avoiding violent mechanical shaking, and keeping reconstituted samples protected at 2-8 °C, researchers ensure consistent laboratory data and preserve the chemical integrity of their materials.
At Biogenix Peptides, we emphasize adherence to rigorous analytical standards across all laboratory workflows. To expand your laboratory procedures and refine your operational workflows, continue reviewing validated internal handling standards and research-only documentation before beginning any peptide reconstitution process.